December 19, 2018

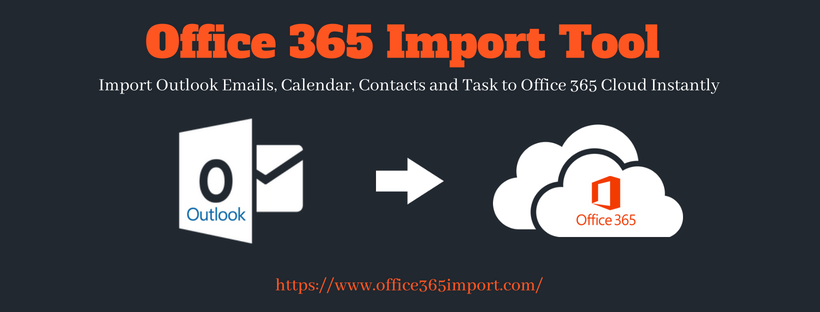
Best 2 Measures to Export Mac Outlook Contacts to vCard

Are you searching for a solution to move contacts from Mac Outlook to VCF file? Have you ever tried the migration process manually? If no, then do not get panic, because we are here to explain a complete procedure to export Mac Outlook contacts to vCard. In the following segment, both manual and automated solutions are being discussed.
Contacts always play a significant role when it comes to communicate with others. There are many people who work in the organization, use Mac Outlook to deal with emails, contacts, and calendars every day. But, apart from the advanced features of Mac Outlook, it still has some shortcomings. Therefore, many users need to switch contacts from Mac Outlook to VCF whether at professional or personal level. Here, in this blog, we are going to discuss a step-by-step procedure to transfer Outlook Mac contacts to VCF.
 

Manual Workaround to Export Mac Outlook Contacts to vCard


If users are using Outlook 2016 on Mac computer, then there is a solution that allows to move contacts from Mac Outlook to VCF file. Please have a look:

Note: Exporting Outlook contacts on Mac using the steps below will migrate all contacts stored within Contacts App on your Mac machine.

  • First, create a new folder on your PC and name it as Outlook Contacts.
  • After that, you can Launch Outlook 2016 on Mac platform.
  • Choose the contacts that you want to export from Mac Outlook.
  • Drag all contacts onto Outlook Contacts folder on your system.
  • In the next step, you can open Contacts App.
  • Open Outlook Contacts folder on your system.
  • Choose contacts under the Outlook Contacts folder and drag them into Contacts App.
  • From the Contacts App, go to File menu and choose the Export button.
  • At last, select Export vCard option and save files onto the Desktop.

Alternate Way to Export Mac Outlook Contacts to vCard


After performing above steps, now users can easily transfer contacts on Mac Outlook to VCF file. But, this method has some drawbacks so that users can switch to another third-party tool, i.e., Mac PST Converter. This software is designed in such a way that it makes easy for end users to execute  migration within a few clicks. It is capable enough to export Mac PST file to vCard format in bulk. Also, it helps to preserve the folder hierarchy integrity while converting PST to VCF file. It has a simple, interactive, and user-friendly interface that even a novice user can use it without taking external help. This tool is operable on all versions of Mac including Mac OS X 10.8 and above versions. Apart from this software, provides other file format migration also. Converting PST to EML, MSG, MBOX, EMLX and PDF is among the other important features of this utility.

Now, let’s discuss a complete procedure to migrate PST files into VCF file format:

  • Download and Install Mac PST Converter Tool on your desktop
  • Then, click Add File & Add Folder option to add multiple PST files
  • Once the file or folder has been selected, it will be shown on the software pane. Click Next
  • To export Mac Outlook contacts to vCard (.vcf), just go with MBOX, EML, and EMLX option. After selecting any one option, you will get the following filters:
  • a) Date filter: This feature can be used to filter out the final data files as per the date range.
  • b) Categories: Click on the Contacts especially for data migration. 
  • c) Naming Convention: This gives the naming of final exported files like Subject+Date,  Autoincrement, From+Subject+Date, and so on.
  • Now, hit on Change button to select the final destination for converted VCF data files.
  • Choose the desired location where you want to store the exported files.
  • After selecting the file to transfer, click the Export button to start the processing.
  • Now, the export process has been completed successfully. Press OK button.


Time to Conclude


As we all know, contacts are most important to increase the level of business process continuity. Therefore, it is necessary for users to export Mac Outlook contacts to vCard format. In the above- discussion manual and automated ways are described, which makes easy for them to transfer data. Users can use any of the approach to accomplish the task without any risk or data loss.
November 27, 2018

Easiest Way to Unlock PDF with Mac Preview

“Have you ever been in a situation when you want to remove password protection from PDF on Mac OS X? Founded manual technique but don’t how to implement the steps to unlock PDF with Mac Preview application? If yes? then, your problem will end here, because here we have provided the best solutions for the problem. So, continue reading.

The most reliable way of keeping confidential information safe in PDF file is to add password protection. In this way, when somebody tries to access a file, they will have to enter a password. Basically, this security won’t let unauthorized people to access the PDF file. But, there are times when it is needed to unlock password to remove PDF restrictions on Mac OS X. This often happens when it is needed to send portable files to someone who does not even know how to unlock it with a password, and so on.

But, from now removing password protection from PDF on Mac Operating System will be a very easy task. In the upcoming section, we are going to discuss a manual solution that will help to unlock PDF with Mac Preview.

Manual Approach to Unlock Password Protected PDF on Mac

Follow these simple steps to know how Mac Preview Unlock PDF documents

Step 1:  First, you have to open the password-protected PDF file using Preview, for that, right-click on PDF file and choose Open With >> Preview option. It will launch a file in Preview on Mac OS.


Step 2: Since a file is password protected, the application asks you to enter the password for that file before you view its contents. After entering the password press the Enter key. If a password is correct, you will be able to view PDF document in Preview.


Step 3: Once a file is opened, click on the File menu and then, select Save option. As an alternative, you can press Command key + S. It will help you to save a portable file (PDF).


Step 4: On the next window, choose a particular place where you wish to save a new password-free PDF file. Now, the option that will help you to unlock password protected PDF on Mac is “Encrypt.” Keep in mind that it should be unchecked. Once it is done, click on Save button to save that file.


Step 5: Now, you can open this file without entering any password.

Note: One of the major disadvantages to unlock PDF with Mac Preview is that only single PDF file can be unlocked at a time. With this technique, multiple PDF files cannot be unlocked at a single time. Also, to remove permission password from PDF, the Mac Preview application will request for the permission password.

Instant solution to Unlock / Unsecure PDF on Mac OS X

As we have seen that that are various disadvantages when we unlock PDF with Mac Preview application. Hence, to overcome these limitations & to remove password protection from PDF on Mac in batch, use a reliable third-party tool named as Mac PDF Unlocker Tool. With this application, users can unlock multiple PDF documents on Mac operating system. It is designed in such a way to remove PDF restrictions without asking the permission password. This software is capable to print, edit, copy, and extract text without facing any difficulty. The best thing about this tool is that there is no need to install Adobe Acrobat to unlock PDF on Mac. Here are the following steps to unlock restrictions from PDF file on Mac platform:

Step 1:  Launch Mac PDF Unlocker tool on your Mac machine.


Step 2:  Select Add File(s) or Add Folder(s) option to browse secured PDF file.


Step 3:  By default the desired location of unlocking PDF file is desktop. To change it by clicking on the Change button. Now, the file has become loaded, software displays Unlock Status of PDF file as Pending.


Step 4:  After that, click the Unlock PDF button and start the PDF unlocking process.


Step 5:  As a file gets unprotected, then the Unlock status of PDF file gets changed from Pending to Completed. 

Step 6:  At last, you will get a pop-up message “Unlock process completed successfully” when PDF file gets unlocked successfully.

Step 7:  Click the OK button to proceed further.


The Final Word

In this write-up, we have learned how to unlock PDF with Mac Preview. But, due to some limitations of the manual technique, it becomes difficult to batch unlock password protected PDF on Mac OS X. Therefore, in this blog, we have suggested a reliable and instant solution named as PDF Unlocker tool to fix issues. It is the most reliable tool that can remove password protection from PDF on Mac OS X without any hassle.
October 05, 2018

Apple Mail to Outlook Conversion | Best MBOX Conversion Methods

Convert MBOX to PST


“Are you searching an instant solution for Apple Mail to Outlook conversion? Here, we come up with an appropriate and prominent way to do same.”

Users often need to switch from Mac mail to Outlook. Mac Operating System supports Apple mail as its email application. This has a lot of functionalities which can be advantageous to the Mac OS users. But there might be several causes prompting a user to move to Windows OS.

Apple Mail exports mailboxes as MBOX files. One can transfer a Mac Mail mailbox using the 'Export Mailbox' option and save it as MBOX file. Although, if you need to perform Apple mail to Outlook conversion, we will discuss two prominent ways to execute migration. User can go with the third-party application such as MBOX Converter. Otherwise, user can also prefer the manual method to perform conversion.

If you are searching to transfer all data from the MBOX file to an Outlook PST file in Windows, then you have to perform the procedure of MBOX to PST conversion.

How to Perform Apple Mail to Outlook Conversion Without Data Loss?

The process to import Apple Mail to Outlook is considered important by the users who needs to access their Apple Mail in Outlook for Windows. If you were stuck in finding a method to import Apple Mail to Outlook and wasting your productive time. But, with the use of MBOX Converter tool, user can easily import MBOX to Outlook with their associated files.

This software provides a preview of MBOX email messages along with their attachments in efficient way. And migrate all email items from selected MBOX files and folders. This utility is equipped with amazing functionalities. Some of its features are listed below:

What Outlook Offers that Apple Mail Doesn’t Provide?

  • Reviews all MBOX emails along with attachments in efficient way
  • Moves all email items from selected MBOX data files and folders
  • Migrates all emails from several MBOX to PST file in batch mode
  • Split resultant PST file by size in GB and MB as per convenience
  • Software is able to Export MBOX to PST without Outlook program
  • Compatible with all advanced versions of Windows OS and below

Steps Needed to Migrate Apple Mail to Outlook Using MBOX Converter

Step 1: Firstly, download and launch the MBOX to Outlook converter software into your local machine.

Step 2: Now, you can choose “Add File” as an option, if you have to add single or various MBOX file(s) with manual selection.

Step 3: Selecting an option to “Select File/Folder System” you can also fetch MBOX files from the location known to you.

Step 4: Browse MBOX data file and select “Open” to open it.

Step 5: You can also choose Folder mode to opt batch MBOX files at a time.

Step 6: Here, you have to choose folder that includes MBOX files and hit on “OK”.

Step 7: Next, to avail review of attachments in preview wizard, select the Attachments tab.

Step 8: In this step, you can switch the view mode of the emails, such as Horizontal or Vertical View as per your requirement.

Step 9: Choose the option "Export All Folder" to migrate all the MBOX data files at once.
  • Export All Folder: This feature allows to move all the MBOX files at a time.
  • Export Selected Folders: This option permits to export the specified and selected folders.
Step 10: Opt the file type in which you need to migrate MBOX files. Also, you can change the default location by opting "Change Location" button.

Step 11: Choose Destination location and select OK button and then click on “Export” button to begin the export procedure

Step 12: Once the migration process begins, you will get the following wizard, showing the details as shown in the image below.

Step 13: Finally the export process completed successfully. Hit on OK


Import Resultant PST File to Outlook for Apple Mail to Outlook Conversion

After performing the above-mentioned steps of export MBOX to PST. Now, user have to import that resultant PST data file to Outlook account. If, user think that after conversion of MBOX data file to PST the procedure is being completed. So, they should have to aware about the reality. There is one more step is inclining in the method i.e., import output PST data file into MS Outlook.

How to Perform Mac Mail to Outlook Conversion Manually?

Apart from the software here is a manual way to resolve the users problem. With the help of this solution user can also migrate Apple mail to Outlook. All the steps are listed below, you just have to follow all of them in sequence to get better outcome.

Step 1: Launch and start Apple Mail application into your Mac machine

Step 2: Hit on “File” option and then “Import Mailboxes”.

Step 3: Now, under “Import data from” option choose the program from where you wants to transfer data i.e. “Files in MBOX Format”.

Step 4: Select “Continue” to move forward.

Step 5: Click on “Choose” to browse the location of the MBOX file. Then select “Continue” tab to move forward.

Step 6: Finally, to get over the procedure hit on “Done

Final Verdict

In this section, we described two approaches to perform Apple Mail to Outlook PST conversion. Manual method contains some constraints that affect the migration process positively. It is a lengthy and time-consuming procedure. It becomes a hectic procedure if by mistake you skip a single step. Thus, we come up with an appropriate solution such as MBOX to PST Converter software. With the help of this software user can safely transfer Mac mail to PST effortlessly. This tool furnishes an easy-to-use interface so, a novice can also avail it. Afterwards, it totally depends on the user, which one they wants to opt. They can choose any method as per their desire.
October 05, 2018

Office 365 Import PST Tool – 100% Migrate Outlook Data to Office 365

Office 365 Import PST Tool

Microsoft Office 365 is a cloud-based application, which is a secure place for data storage. Due to its various advance services many users prefer to use it. Also, it permits the user to access all sensitive documents, emails, contacts, etc., anywhere at any time. Apart from this, everyone wants to move their bulk PST emails to Office 365 account. But, this is a challenging task for users, therefore, it is not an easy to execute. Therefore, to resolve this issue, users can take help of an automated solution, i.e., Office 365 Import PST tool, which comprises of all the useful features. In this review page, we are going to discuss about this Migration tool in brief with all its features in detail.

Commendable Features of Office 365 Import PST Tool

  • Migrate Outlook Data to Office 365 Admin Account
    With this Office 365 PST migration tool, users can import PST files to Office 365 suite effortlessly. Also, it allows the user to move multiple PST files to O365 admin account or a user account as per the convenience. One just need to login to Office 365 profile by entering a valid password and username. The application will validate that account and permits to migrate PST to Office 365 account without any hassle.
  • Office 365 Admin Account
  • Offers 3 Options to Migrate Outlook PST to O365
    This software equips three different options like Add Files, Add Folder, and Add CSV while importing PST file into Office 365 Webmail. If the user will manually select and add PST files, then he/she will choose Add File(s) option. To import all PST files into Office 365 account, add each folder that contains multiple PST files in it, one can go for Add Folder option. Further, the user can upload CSV file consisting all details for each PST file.
  • 3 Options
  • Export Selective Data from PST File
    Office 365 PST Import tool renders option of selective data migration, instead of migrating complete Outlook mailbox to Office 365 user account. It allows the user to perform category-wise migration. Also, it is capable to import all PST items like calendars, contacts to Office 365 account without Outlook. Moreover, one can apply date-range filters to perform selective conversion from Outlook PST to O365 mailbox and save lots of time.
  • export Selective Data
  • Option to Attach Outlook PST Files
    It is a foremost utility, which focused on the internal folder hierarchy also. This Office 365 Import software helps to preserve orientation of all items and folders of a source file when migrating PST file to O365 account. If the user enables this option, it will generate a new folder in Office 365 Webmail with original name of PST and retains the original file structure. This will help to avoid any confusion in accessing data when moving PST files to Office 365 Online.
  • Attach Outlook PST file
  • Exclude Deleted / Sent Items Folder
    Another impressive feature of this Office 365 Migration tool is that it let users avoid conversion of unnecessary folders. Thereby, if the user does not want to import sent items or deleted items folder from Outlook PST to Office 365, then he/ she needs to verify this option and proceed. In addition, this Office 365 Import software will not include both of these folders during Import procedure.
  • Provide Option to Include Folder
    During migration process, this Office 365 Import tool will let users export a specific folder from Outlook PST file. To avail these services, one just needs to check Include Folder option and identify the required folder location like : "test/name/sample". In this condition "sample" folder inside the "test" only folder will become imported to O365 Webmail. This feature is also helpful if users want to perform customized migration.

Versions of Office 365 Migration Tool

The Office 365 Import tool is available in two editions i.e., Free and Licensed Version. As per the need, users can select any one of the two editions:

  • Free Edition: The Office 365 migration tool is available on company’s official website. One can download and install the setup of tool for understanding the overall working of product. However, there is a limitation of this version that it will import only 25 items per folder from PST to O365.
  • Licensed Edition: It is the full or licensed version of O365 PST Import, which allow the users to migrate multiple Outlook PST files to Office 365. There is no such constraint imposed in this version of the software therefore, one can buy this product from official site and, perform Outlook to Office 365 migration easily.

Working Steps of Office 365 Import PST Tool

  1. Launch Office 365 PST migration tool on your system.
  2. Then, enter all valid credentials i.e., Office 365 ID and Password.
  3. Choose Add File (s) or Add Folder to import all PST files into Office 365 Mailbox.
  4. Next, you can Add Username and Password for individual user Account. This option is valid if Admin Account cannot be impersonated.
  5. Once the PST file is browsed, choose File Categories and apply Date-wise Filter Options.
  6. Finally, the software will migrate Outlook data to Office 365 successfully.

Pros & Cons of Office 365 PST Import Tool

Pros

  • Allows to migrate one or more Outlook PST files to Office 365 account.
  • Option to perform incremental import from save PST after first attempt.
  • Offers Date-wise filter to migrate selective items from PST to O365 Suite.

Cons

  • Software does not support Mac operating system.

Observational Verdict

After understanding the pros and cons of the tool, we can wind up with the fact that Office 365 Import PST tool is an all-rounder solution. It is programmed in such a manner to migrate Outlook PST file to Office 365 account in bulk. Also, it has a simple and interactive interface that even a novice user can understand its layout easily. Thus, it can be rated as 9.8/10 because it will not support Mac operating system. Besides this, there is no other negative point of this application and I can proudly say that there could not be any other software like this.

September 03, 2018

How to Create Office 365 Email Signatures Centrally – Step by Step

How to Create Office 365 Email Signatures

An email signature plays an essential role in marketing, personal branding, and online visual identity. It can be considered as almost like a digital business card that is simple and small. The email signature conveys a professional image, serves as a free marketing tool for everyone you are connecting or responding, and makes it easier for others to get in contact with you. Today, most of the organizations and users are utilizing Office 365 and they want to append the digital signature in each email message to prove their authenticity. However, there are several users who do not know that how to create automatic signature in Office 365/ Exchange Online. In order to help users in performing such task easily, we have come up with this editorial. Here, we will disclose the manual technique of adding an automated email signature in Office 365. So, let’s begin.

Picture This Out!

Before proceeding further with the solution to create auto signatures centrally in Office 365, have a look at the following query. This query was asked by an Office 365 user who wants to create an email signature in Office 365.

“I want to add an email signature of few lines in the text format that is placed at the bottom of all the outgoing emails of my Office 365 account. This email signature will include my name, company, website, contact number and a short elevator pitch or you can say my favorite quote. So that, I can use this for sharing my essential contact information and advertise myself both. However, I do not have any idea about how to create auto signatures centrally in Office 365. So, is there any expert who can suggest a solution for the same?”

Guidelines to Set Up Auto Email Signature in Office 365

The Office 365 or Exchange Online is capable to automatically add text/ HTML or even image signatures. Below are the steps for this:

  • First, log in to office.com with your office365 account.
  • Next, click the dots/ App launcher icon on the top left corner and choose Admin option.
  • Click on Show more menu from the left sidebar.
  • Expand the Admin centers options and choose Exchange to navigate to the Exchange admin center.
  • Select mail flow and click on Add (+) icon, select Create a new rule.
  • In the ‘new rule’ dialog box:
  • Type a name for the new rule
    • Select Apply to all messages option in Apply this rule if… section
    • Select Append the disclaimer… in Do the following… option
    • Click on Select one… alternative and choose wrap option from the specifed fallback action wizard that prompts
  • Choose Enter text.. option and the key in your desired signature

  • Note: This field also supports the HTML tags so make sure to use of that
  • To verify the done procedure, send a test mail and check if it works

The Technical Challenge

As the in-built email signature editor is such a handy tool however, it includes some limitations. Such as:

  • You CANNOT place an email signature under the reply.
  • You CANNOT test the email signatures in advance.
  • You CANNOT prevent images from being blocked.
  • You CANNOT append side banners to messages.
  • You CANNOT see the signatures in Sent Items.
  • You CANNOT remove signaling phrases next to the empty Active Directory fields.
  • You CANNOT force email format to be available.

Concluding Lines

Signatures have radically developed and are being utilized by the whole of our civilization. This is a great way to personalize email messages or meet the regulatory compliances with all legal disclaimers. Thus, for users who are searching the solution for how to create auto signatures centrally in Office 365 / Exchange Online, this article provides a simple as well as an effective solution. Executing guidelines sequentially will enable automatic signatures on all the Outgoing emails in Office 365.

September 01, 2018

Why Should We Use OneDrive for Business – Top 11 Reasons

Use OneDrive for Business

Due to the adoption of cloud-based tools, people are working in a more effective and smart way. Organizations who are making use of Office 365 for their all business related chores, for them OneDrive for Business plays the most vital role. For both end users and cloud IT admins, OneDrive for Business is becoming one powerful solution as it offers additional capabilities to search for efficient ways to manage the big influx of data. Still, most of the users are unaware of the benefits related to OneDrive for Business. There are numerous capabilities that admin can implement or share with the end users to boost adoption and create power users. Therefore, in this blog, you will learn why to use OneDrive for Business. This will help the organizations to increase work productivity achha nhi lgg rha, alone feel and simplify the collaboration.

11 Reasons to Know Why Use OneDrive for Business

1. With OneDrive for Business Sync Tool Work Offline

With a cloud platform, the user can work from anywhere, on any device, at any time. But sometimes, the user does not have Internet access. Still, OneDrive allows the users to work offline. It offers a tool which helps the user to prevent the user’s Wi-Fi issues.

To work offline the user needs to download the OneDrive for Business sync app. Then he/she has to sign into Office 365 to navigate to OneDrive. Then the user has to search the library which he/she need to access offline and then press sync. The OneDrive for Business library allows the user to sync up to 20,000 files and folders.

The user can also pause or stop OneDrive for Business from syncing when he/she is having low bandwidth issues or accidentally began syncing process.

2. Gain Insight into Your Organization using Office Delve

Office Delve is the Microsoft’s new product, which allows the user to see what his/her colleagues are working on across Office 365. Delve integrates with the OneDrive so that the user can search and share documents with instant results. It acts as a project management tool and social media network all combined into one simple package.

Basically, Office Delve is powered by a technology called as Office Graph. It maps the relationships between people and content according to the Microsoft. Delve has a card-based interface which looks a lot like Pinterest. Each card is made up of documents and informational bites such as comments, likes, views, and tags which shows why and how each card is important. Cards are dynamic due to which the users are able to click and edit immediately. Moreover, one can also comment when the document is launched in Office 365.

3. Save Attachments Directly From Email to One Drive for Business

Many Office users spend much of their workday in sending and receiving files through Outlook. This is the benefit of the integrated file sync and share solution. It allows the user to connect to the applications that the user use most often such as Outlook.

The user can save the file attachments directly in OneDrive for the Business folder using Outlook Web App. Now, to save all the documents in an email, the user has to select Save to OneDrive or Save all to OneDrive. This will save the user documents to OneDrive folder called as Email Attachments. After that, you can easily move from folder to another folder within OneDrive or sent as cloud attachments.

To save a single attachment click on the down arrow and then select Save to OneDrive...BetterCloud

4. Check Out Your OneDrive for Business Storage Space

Now, the user can easily store a large amount of data in Office 365 as Microsoft has increased the cloud storage space available to Office 365 business subscribers from 25 GB to a full terabyte.

To check how much storage space is available to you, navigate to your Site settings page in One Drive for Business and then select Storage Metrics. Now, you will be able to see the allotted space remaining in the bar present in the upper right corner.

5. Enabling and Using Version Control

To stay up to date with the latest changes that are made by the user or his/her colleagues in the documents, Version Control is the best way.

To make use of Version Control, make sure that you are having version history enables in OneDrive for Business. To check it, select any file in the library and then click on Files > Version History. If this option is grayed out then you may need to contact your organization’s administrator to enable it.

Moreover, the Admins can also enable or remove version control from the complete list or the library. Version control settings can be configured to save a new version every time editing is done, depending on the importance of the document.

Once the user has enabled the version control, he/she can view, restore, or delete an earlier version of the document.

6. Configure Links to OneDrive for Business in Your SharePoint

Admins whose organizations are using both SharePoint 2010 and OneDrive for Business this option is good for them. As an admin, the user can set up a link that appears in his/her organization’s SharePoint. This will send users directly to their OneDrive for Business account.

After configuring links to OneDrive for Business in your SharePoint, it will become easy for the end users to navigate from SharePoint to OneDrive for Business.

7. OneDrive for Business on Your Mobile Device

Now, the organizations that use OneDrive for Business can access it on Windows Phone, Android and Apple devices. These apps are designed for ongoing working thus, they are not as efficient and powerful as their web-based or desktop counterparts. However, they have some inherent capabilities which are beneficial on these devices.

With Android devices, the user can pin folders to the home screen for quick access. For this, the user first has to download the OneDrive app on the Android device. After that, tap and hold on a blank space of the home screen and then select OneDrive. Now, he/she will be prompted to select a folder to pin it to your home screen. For enhanced security while accessing OneDrive account set up a PIN or use iOS TouchID.

8. Create and Host an Online Survey

The user can also create a survey with Excel Online, this helps the user to poll a group of friends on various things such as vacation destination preferences etc.

  • In OneDrive: Click Create > Excel Survey
  • In OneDrive for Business: Click New > Excel Survey

Note: Only personal OneDrive users can follow the next three tips. These tips are not available in OneDrive for Business.

9. Access your Other PC’s through OneDrive

Cloud allows the user to access the documents from anywhere, but OneDrive for Windows permits the user to access their other PCs. Even if the files are not in the user’s OneDrive folders then also he/she can access his/her PC’s through OneDrive. To access documents on other PC’s, the user needs to enable the Fetch Files feature.

10. Embed an Office Document in a Webpage

Would you like to share your PowerPoint or Word document with the readers? No issues, you can take advantage of OneDrive which allows the user to embed documents directly on his/her website or blog. The user just has to check the box next to the name of the document which you want to embed. After that, right click and select the Embed option. Now, select Generate to generate the HTML code. The user can use this HTML code to embed the document into his/her site.

11. Use IFTTT for OneDrive

If This Then That or IFTTT is a tool that automates tasks in the user’s everyday life. The user can connect to IFTTT to OneDrive and make multiple tasks easier.

  • Upload all the new iOS photos to OneDrive
  • Archive incoming attachments from Gmail to OneDrive
  • Upload all new Flickr photos the user post to OneDrive

Summing Up

There are numerous organizations that are migrating to Office 365, OneDrive for Business as it is important for the end users and admin. OneDrive for Business offers various management capabilities. To improve the collaboration and productivity, it is necessary for the admin to take full advantages of it. Thus, in the above section, we have explained different OneDrive for Business tips that will help the users to boost adoption and create power users.

August 30, 2018

Split Oversized PST File by PST Splitter Full Version Safely

Split Oversized PST File

It is very obvious fact that managing large size data on local machine is quite difficult task, generally when it is about storage of email data files. Normal computer users like me becomes tensed when they find that maximum amount of machine hard drive storage space is getting occupied by email file formats. One such file format is PST file, which is generated from Outlook email application and is used for storage of its data items. The size of this file increases with daily receiving of new mails in Outlook or due to some additional information, inserted by users. Therefore, in order to handle oversized PST files in an error-free way, one should regularly create multiple PST files by truncating Outlook storage files.

Now a question arises that how to split oversized PST file into smaller parts without affecting the original data integrity? Then, the appropriate answer to this question is Split PST software, which provides functionality to split PST file size, date, folder and by year. In the following section, I am going to tell readers my personal point of view regarding the PST splitter tool.

About Split PST Software

The PST splitter is the best tool to split oversized PST files for all Outlook users who want to divide large PST file into smaller parts. The tool renders four different options to cut PST file i.e., truncate PST file by size, divide PST by date, split large PST by Year, and separate Outlook file on basis of folder. No matter whether one is using an older operating system or a latest one, the application gives its 100% result on all platform in all aspects like working speed, conversion rate, perfection, etc. There is no risk of any data loss when tool is cutting a PST file into two.

Split PST Software Overview

Software Function Truncate large PST files on basis of Date, Year, Size, and folder
Product Version 4.2
Size of the Tool 7.4 MB
Prerequisites Microsoft Outlook should be installed and successfully configured
Windows Compatibility Compatible with 10, 8.1, 8, 7, and all below versions
Microsoft Outlook Supportable with all editions of Outlook, including 2016

Astonishing Features of PST Splitter

  • Provides 4 Options To Divide PST File: The product renders functionality to split PST file on basis of following four options:
    • By Date
    • By Folder
    • By Size
    • By Year
  • Equips Work to Divide Archive PST file: Split PST software is capable of separating entire mailbox items of the Outlook file i.e., emails, address book, tasks, calendars, etc. In addition to this, users can break archive.pst file or folder by choosing option of cutting Outlook data archive file to manage it easily after importing files back in MS Outlook.
  • Fix Corruption Due to Oversized PST File: The application is an error-free means to overcome all the errors, which causes corruption in PST file due to exceed in size limit. In order to keep PST file safe from getting it damaged or corrupted, one needs to manage large Outlook PST files by regularly cutting them with help of this application.
  • Option to Choose Outlook Version for File: One need to choose the version of source PST file from which it is generated. The PST Splitter software is capable of supporting ANSI as well as UNICODE PST file, which means that tool is comfortable with all versions of Outlook i.e., 2016, 2013, and below ones.

Editions and Extents of the Splitter

Developers of Split PST software had provided dual editions i.e., Trial edition and purchased editions. The explanation of both these editions is given below:

  • Free Version
    In this version, one just need to download setup.exe file of PST Splitter from the official site of the organization and then install it. However, there is restriction in free version of the tool that it only splits first 50 emails of the source file and if users have chosen Folder option for splitting then, program will only be able to split 10 emails from each folder.
  • Purchased Version
    In order to enjoy working of our Split PST product without any limitation, users can purchase online the licensed version. The entire payment work will be conducted online, ensuring users that there will be no fraud while performing the transaction.

Pros & Cons

Pros

  • Provides four independent options to truncate PST file.
  • Feature to split archive PST file without any data loss.
  • No file size restriction for source Outlook data file.
  • Divide PST file with all items like emails, tasks, etc.

Cons

  • Requires Microsoft Outlook installation for working.
  • Does not provide option to split corrupted PST file.

Time to Conclude

Based upon functionality of the software, I would like to rate this product 8.5/10 because it requires Outlook for its working. However, the relief point is that it is not mandatory to have an account to be configured in Outlook for functioning. Apart from this, all other features are perfectly created by the developers and I highly recommend users to truncate Outlook 2016, 2013, 2010, etc., data file with help of this Split PST software.

August 27, 2018

How to Get Rid Off of Outlook Stuck in Offline Mode Issue

Outlook Stuck in Offline Mode

Microsoft Outlook is the proficient email client that has reached the height of popularity. It is the top most choice for any business user. Therefore, being a widely used email client, users expect Outlook to work without any issue. But in some cases, users encounter problems while working on Outlook. One of the rarest problem faced by the users is Outlook stuck in offline mode and users are unable to get back online and receive emails.

However, when a user restarts the Outlook and have an active internet connection, nothing works and Outlook remains in some state. In the worst situation, the work offline button also get greyed out. Thus, to get Outlook back in the normal functioning state, a user needs to fix this issue as soon as possible.

Consider the following queries asked by the users:

“I am an Outlook user and shared lots of emails with my clients on daily basis. Daily I open Outlook on my laptop and receives emails automatically. Now, I have to click on the Send/ Receive button every time I want to receive an email. I do not know, how I can fix this issue. What is the exact problem behind this? Can anyone out there tell me why my Outlook 2007 stuck in offline mode?”

“Hello, I am using MS Outlook 2016 from many years and everything was running fine until last night. I just got a message from a colleague that he has sent me one report. I opened Outlook and tried to check new emails but unable to receive any new messages. After that, I checked Outlook was in offline mode and I changed it to online mode. But the problem is still the same, I do not know what has exactly happened. Any suggestions?”

How to Fix Outlook Stuck in Offline Mode Issue Manually?

Case #1:

If Outlook profile of any user stuck in an offline mode, then he or she needs to check whether Outlook is working in online mode or offline mode. And, for the same, a user needs to look at the lower right corner of the screen. If it is connected with Exchange Server, then it displays Connected to Exchange Server or Online depending upon the version of Outlook.

Now, if Outlook is working in Offline mode, then it needs to be fixed. And, for that, you just have to click on the arrow right of “Offline” and simply uncheck the “Work Offline” option.

Case #2:

Another possible case could be that the Exchange account is not being in the “Cached mode”. Thus, one must enable it by following the simple steps mentioned below:

  1. First of all, press Window key from the keyboard.
  2. After that, type Mail in the Search box and hit Enter key.
  3. Then, click on the E-mail Accounts button.
  4. Next, you have to double-click on your Exchange account.
  5. At last, check Use Cached Exchange Mode option.
  6. In Outlook 2013, click on More Settings button >> Advanced tab and then enable this option.
  7. Finally, click on the Close button.

After following the above steps, a user may need to close and reopen the Outlook application to get on with the email activities.

Closing Words

When a user is unable to send or receive a new message from Outlook, it becomes a serious problem. It generally happens when Outlook stuck in offline mode. However, the main issue behind this is that either there is a poor internet connection or some issue with Exchange Server. Thus, it is important to fix this issue as soon as possible and let Outlook work normally as before.

June 27, 2018

5 Most Common Outlook Issues and Solutions - Perfect Troubleshoot


Outlook Common Errors and Solutions

Outlook is the most widely used Email client all over the world. The reason behind this is the easy-to-use interface and advanced features of Outlook. But it has some glitches or error also. Some errors in MS Outlook arises out of nowhere. These errors can be a trouble for the user as they are difficult to resolve. Some most common Outlook issues are:

  • Outlook not responding.
  • Inactive or Sluggish working.
  • Issues with profile handling.
  • PST corruption.
  • Outlook crashes unexpectedly.

And many more. We will study about the causes and solutions for these Outlook common errors. Follow the article till the end to find the solution of the above-listed 5 common Outlook issues.

Some Common Reasons Behind Errors in Microsoft Outlook

There can be many reasons for a single error in Outlook. But some of the main causes can be as follows:

  • Sudden power failures
  • Corrupted PST file
  • Virus attack on your system
  • Using old version of Outlook
  • Incorrect configuration of Outlook

Many times these are the causes through which Outlook error arises. But as I said there is not a single cause responsible for an error, there can be many other reasons.

Common Microsoft Outlook Issues - Reasons & Solutions

1) Sluggish or Inactive Outlook Performance

If a user is using Outlook from a long time, then he/ she must be familiar to this error. Over a period of time email, entries, calendar etc., keeps on piling in Outlook and its size increases abnormally large. After a point of time, the size reaches its limit and results in slow working of Outlook.

Solution: A user can simply starve the PST file. Delete all unwanted emails that are larger than 100 KB. If there is an important email, then store it in disk and clear the PST and clear all trash.

2) Outlook Crashes Unexpectedly

Sometimes the things which are meant to help us itself causes trouble for us. There are many Outlook add-ins which are designed to help us and make Outlook easier. But sometimes these Outlook add-ins itself get corrupted and generates an error.

3) Outlook PST is Not a Personal File Error

There can be various possible reasons behind this error like corruption in PST, sudden power failure, PST file is marked as “read-only” attribute or it is saved in CD.

Solution: To fix this error you have to follow the following steps:

  • First of all, move your PST file from CD to the hard drive.
  • After this, uncheck the “Read Only” attribute by going in its Properties

4) Your Are Sending Spam Mails

Many of your friends may have tell you that they are getting unwanted or spam mails from you. And this all happens without your knowledge. This could be dangerous if the receiver is a business associate and the mail is irrelevant The reason behind this error can be a malware in your computer system that has access to your email address. And, the other possible reason is that your mail account is hacked.

Solution: To fix this error you can just simply change your email password. But in some cases a user is not able to change the password, then you have to report this issue to Support team immediately. You can also run an anti-virus to scan your system and remove the malware.

5) Unable to Start MS Outlook

According to many experts, corrupted PST file or corrupted navigation pane settings is the reason behind cannot start Microsoft Outlook error. Whenever you see a file with a name like, file_name.xml and its size is zero it means the file is corrupted.

Solution: Follow the below-mentioned steps to fix this error:

  1. First of all, go to Start >> type Outlook.exe /safe in search box.
  2. Then remove all the add-ins

NOTE: To disable all the add-ins follow the following steps:

  1. Choose file Tab >> Options >> Add-Ins >> select Com Add-Ins.
  2. Now, click on Go option >> clear all the choices in the list box
  3. Then, click on OK button and restart Outlook.

Expert Solution to Fix Common Outlook Errors

The above mentioned solutions may have some limitations but the solution which I am going to tell you overcome all the limitations of above method. Experts suggests the users to use a third-party tool to fix the all above errors. The most widely used third party tool is Outlook Recovery tool. With the help of this tool a user can solve any Outlook error with in minutes. Key features of this tool.

  1. Recovers permanently deleted Outlook emails.
  2. Repair damaged PST file in Outlook.
  3. Repair multiple PST Files in Batch Mode.
  4. No PST File Size Limitations Imposed.
  5. Recover Password protected corrupted Outlook PST files.
  6. Repair & Recover deleted Outlook PST Data items.

Wrapping Up

Any small error in Outlook can create big trouble for the users. It might lead to inaccessibility of mailbox data, which break the continuity of the work. Thus, in this post, 5 common Outlook issues faced by a user are covered with respective solutions. These methods will surely solve the Outlook common errors. In addition, one can also use SysTools Outlook Recovery for better results.

June 24, 2018

Fixed Cannot Start Microsoft Outlook Error in Win 10 – Best 5 Solution


How to Resolve Unable to Open Outlook Error?

Outlook is the widely used email client by millions of users. But sadly it was found that many users complained their Outlook is not opening and is displaying the following error:

This error can be a big trouble for you, as it is hard to fix. So, let us discuss all possible ways in which you can fix cannot start Microsoft Outlook error message.

Reasons Why Outlook is Not Opening in Windows 10

There is no definite reasons for cannot start Outlook error but still some of the possible reasons are:

  • Corrupted PST file can be a cause for this error.
  • Unfortunate power failure.
  • Infected files stored along with Outlook folder.
  • Unsuccessful installation of a program is also a reason.
  • Your Outlook is not up to date and needs update.
  • Outlook is not compatible with the Windows you are using.
  • Using many add-ins for better functioning of Outlook.

Now, that we know the reasons for unable to start Outlook error, let us fix this error by discussing it’s solution.

Methods to Resolve Cannot Start Microsoft Outlook Error

Now we know all the possible reasons behind this problem, let us find out the appropriate solution to eliminate this issue. There are various methods to solve this problem. All of them are discussed in the section given below:

How to Fix Cannot Start Outlook Error?

Now, as we know that there are various reasons for unable to start Microsoft Outlook error. So, obviously there will be not only one solution but many. Let us discuss them one by one.

Solution 1: Start Outlook in Safe Mode and Disable Add-Ins

# Start Outlook in safe mode

Every time something wrong happens with Outlook, Microsoft recommends you to start Outlook in safe mode. To launch Outlook in safe mode:
Many users of the Outlook uses various add-ins in order to enhance the functionality. But sometimes these add-ins can create different problems and stops Outlook from opening. As your Outlook is not opening normally, then the only solution for you is to run Outlook in safe mode. By running Outlook in safe mode, all the add-ins will be disabled and your Outlook will be opened normally.

To run Outlook in safe mode follow these steps:

  • Press Windows key + R >> search for Outlook /safe and press Enter.
  • After that,Choose a Profile window will open >> Click Ok.
  • After opening Outlook, go to Files >> Options >> Add-ins.
  • In View And Manage Office Add-ins ensure that the manage box shows COM Add-ins.
  • Now, uncheck all the check boxes to disable all the Add-ins>> click OK/
  • After that, close Outlook.

Now as you have disables all the Add-ins. You have to open Outlook and enable all of them one by one. Until you find the one, which is causing this error.

Steps to enable Add-ins

May be your Windows is not updated and Outlook may not function if your Windows is not upto date. (missing full stop) Steps to Update Windows

  1. Press Windows key+ R >> search for Outlook and press Enter.
  2. Now, go to Files >> Options >> Add-ins and enable some Add-ins.
  3. After this, close the Outlook and restart it.
  4. Then, open Outlook again and enable one or more Add-ins again and repeat this until the infected Add-ins is recognised.

For some users, Add-ins were the cause of this error and after disabling the infected Add-ins the error was solved.

Solution 2: Create a New Profile

In some cases your Outlook profile can get corrupted and you may be can not access Outlook. To solve this problem you just have to make a new Outlook profile.

Steps to make a new profile:

  • First of all, open Start Menu>> type Control Panel in search box >> select Control Panel.
  • After opening Control Panel, select Mail.
  • Right-click on the Show Profile button and choose Add.
  • Enter the name for new profile >> Fill all the Information required >> click Next button.
  • After this, your new profile is created and is added to the General Tab.
  • Select Prompt for the Profile to be Usedoption and click OK.
  • Now, open Outlook click on the recently created profile >> click OK.

Solution 3: Repair your Outlook Data File

As we all know that all of our Outlook data is stored in data file. What if the data file itself get corrupted? Sometimes the whole data file gets corrupted and prevents us from opening Outlook. So, to fix this error you just have to repair the corrupted data file using SCANPST.EXE utility.

Steps to repair data file using SCANPST.EXE

  1. First of all go to Start >> search SCANBPST.EXE and press Enter >> run SCANPST.EXE.
  2. Now, click on the Browse button and select the file you want to repair.
  3. After this, click on the Start button to begin the scan process
  4. If any error is found in the scanning, click the Repair button to repair the file.

Solution 4: Run the resetnavpane Command

You can also fix this Cannot start Microsoft Outlook error by running this command in your PC.

Steps:

  1. Ensure that the Outlook on your system is completely closed.
  2. Press Windows Key + R type Outlook.exe /resetnavpane >> Press Enter.

This command allows you to remove all the customization related to the navigation pane and fixes the errors. These are the best solutions for fixing Outlook not opening error. You can use any of the above techniques to fix the error. You can also use the technique, which is given below in order to fix the error effectively and efficiently.

Recommended Approach to Fix Unable to Start Error

The above given methods are the best way to fix this error but they may not work in some circumstances like badly damaged PST file. In that case you can use the third-party software named. SysTools Outlook Recovery tool You can use this tool repair the corrupted file. It helps the user to get its file repaired without any loss of data.

Wrapping Up

These are the best techniques to help you to fix cannot start Microsoft Outlook error message instantly. Still in some cases, if the above-mentioned techniques do not work. Then you can use the SysTools Outlook Recovery tool to fix this error effectively and efficiently without any loss of data.

June 22, 2018

Fix Microsoft Outlook Not Working Properly Error After Windows Update


Why Outlook is not Working Properly

Outlook is an email client introduced by Microsoft. It enables users to send and receive emails and also acts as a personal information manager. Many users have faced various issues while working with Outlook. They also said that it hangs, stops connecting, stucks and freezes while performing operations. There is a reason for everything, similarly, Outlook also has some reasons for why it is not working properly. It is important to know the cause behind the occurrence of the issue. Therefore, in this blog, we are going to discuss the different reasons that lead to improper working of Outlook. In addition to this, we are also going to explain why Microsoft Outlook is not working after updating Windows and how to resolve this issue.

Possible Reasons Behind Outlook is Not Working Properly Issue

There are many reasons for Microsoft has stopped working. The various reasons for this are:

  • Using an old version of Outlook.
  • Using Outlook to process a large number of data.
  • Bug in your Outlook.
  • Error in your office program is also a reason for this.
  • Outlook data file can be corrupted.
  • Outlook is working for too long on a single process.
  • Too much of Outlook add-ins are executing.

Methods to Resolve Microsoft Outlook has Stopped Working Issue

Now we know all the possible reasons behind this problem, let us find out the appropriate solution to eliminate this issue. There are various methods to solve this problem. All of them are discussed in the section given below:

#1 Remove Hanging Outlook process

While working with Outlook, many users have experienced the hanging issues, even if they attempts to shut it down. Basically, in it one process remains in the memory preventing Outlook from shutting down.To resolve this issue, you have to quit unwanted task from the Task Manger. For this, right-click on Task bar and then select Task Manger. After that, select the unwanted task and click on the End Process

#2 Start Outlook in safe mode

Every time something wrong happens with Outlook, Microsoft recommends you to start Outlook in safe mode. To launch Outlook in safe mode:

  • First of all go to Start Button.
  • Then search for Outlook.exe/safe in cmd.
  • Now it will ask for your approval to launch the application in safe mode by displaying this message.
  • Click Yes and the program will be launched.

#3 Update your Window

May be your Windows is not updated and Outlook may not function if your Windows is not upto date.

Steps to Update Windows

  1. To begin, click on Start menu and type update.
  2. Click Windows Update
  3. Wait till the updating process completes.
  4. Now, click on the Install Updates.
  5. After the updates are installed, restart your windows.
  6. Then open your Outlook and click on the File option.
  7. Click on the Update option >> Update Now button.
  8. After the updating process is completed, reopen the Outlook and it will run properly.

#4 Make Sure Your Outlook is Not Working On Large Processes

Outlook stores thousands of messages and allows to read them any time. Whenever a user tries to delete large amount of data at once, Outlook starts hanging. See the status bar you will know that the process is still in progress. In that case, give Outlook some time to complete all the process and afterwards, it will work normally.

#5 Repair your Office Program

Sometimes just by repairing your office program, ‘Outlook is not responding’ issue and other issues related to Outlook can be resolved.

Steps to repair Office Program

  1. To begin the process, quit all Office programs that are running in the background.
  2. Go to Control Panel >> Program and Features.
  3. Right-click on the Microsoft Office located in the list of installed program.
  4. Select Change >> Repair.
  5. After that click on Continue button.

#6 Repair Your Outlook Data File

Outlook may not work properly if there is an error in Outlook data files you are using. So, to repair corrupt PST file, follow the steps mentioned below:

  1. First of all, open Windows Explorer.
  2. Then, go to C:\Program Files (x86)\Microsoft Office\root\Office16.
  3. Open SCANPST.EXE.
  4. Now click on Browse and select a PST file to repair.
  5. Then, click on the Start button.
  6. Check the Make backup of scanned file before repairing box.
  7. Now click OK to finish the repair.

#7 Create New User Profile

In Outlook you can create multiple profiles and can add a new email to a profile.

Steps to create a new Outlook Profile

  • Close Outlook.
  • Now, go to Start >> Control Panel >> Mail >> Show Profiles.
  • Choose Add, type a profile name in the Profile Name box and click OK.
  • Fill the information required.
  • After creating the Outlook Profile, on the Show Profiles dialog, choose Prompt for a profile to be used.
  • Open Outlook and choose your new profile

NOTE: If by creating a new profile solves the issue, then delete the old profile.

Final Words

Any small error in Outlook can break the continuity of work and there can be loss of data also. To overcome this situation, it is important to fix the issue as soon as possible. Thus, to fix the Outlook is not working problem, a user can try various solutions given above. These solutions will definitely resolve your problem in an efficient way.

May 24, 2018

Best Technique to Reduce the Size of Outlook PST File | Compress PST


Very often, we need to downsize the Outlook database, as we want to acquire small size data files in MS Outlook. Not because the smaller size of Outlook data file improves MS Outlook performance, users can also work without any hurdles and distractions. The problem users generally face is, the task to reduce size of Outlook PST file. Now, this procedure gives headache to anyone who is trying to compress PST files of large size. There are a bunch of issues that show up if we do not compact PST file size in Outlook.

Issues We Face If We Do Not Reduce Size of Outlook PST File 

1. Outlook Slowing Down
The huge PST file of Outlook can create issues for you when you start to work in Outlook. It may hang or slowdown if you are having a very large sized PST file. Generally, it is recommended to compact Outlook data files at the time when you are not working on it and leave it to get compacted.

2. Outlook Not Responding When Opening
This is a very common issue users generally face with the improper functioning of Outlook. This leads to Outlook crashing, freezing, and increase the chances of damaging users’ data.

3. Corrupted Outlook Data File
One of the most common issues that occurs due to overlarge Outlook PST file size, is corruption in Outlook data file. We need to fix this kind of issues to secure our important Outlook data. Our personal storage file (.pst) gets corrupted and we might lose all our data. Although, we can repair the minor corruption with help of the inbuilt SCANPST.EXE or Inbox Repair Tool. But if there is a major corruption in Outlook database, we will have to fix it with the help of Outlook Recovery tool.

Solution to Compress PST File in Outlook

Users should go for automatic solution if they want to compact Outlook data file efficiently and without losing their data. There is a built in method “Compact Now” in MS Outlook that decreases Outlook PST size, but it does not shrink Outlook file size on a big scale, while it minorly compresses Outlook data file. However, we would want to have a fast and effective solution for PST compaction. So, it is highly recommended to use PST Compress software to reduce the size of an Outlook data file (.pst).

We emphasise more on automated method here, because this method is more reliable and at once compresses PST file size in Outlook 2016, 2013, 2010, 2007 and all the other versions. PST Compact Software overcomes all the limitations of the default method for PST compression.

The tool to compress PST has a unique approach to perform its procedure. It does not directly compresses Outlook data file, but separates attachments and performs extracts and saves them in the local destination in the user’s system. Thus, the size of PST file can be securely reduced improving the performance of Outlook.

Bottom Line

As we discussed in the above article, a secure and safe way to reduce size of Outlook PST file. We analysed the consequences of overlarge PST file in Outlook, what issues we face because of it, and how can we resolve these issue. Hence, we come to a conclusion that we indeed, require to compact PST file size in MS Outlook.
April 21, 2018

What is Inbox Repair Tool (SCANPST) & its Location in Windows 10, 8, 7

Inbox Repair Tool or scanpst.exe is an inbuilt tool in Outlook developed by Microsoft. In order to repair any corrupted or damaged PST file, the tool is used. When working on Outlook we face so many issues regarding corruption in Outlook items like Email, Calendar, Tasks, Contacts etc. To fix the issues or the errors we use Inbox Repair Tool (Scanpst.exe).

Where Can We Find SCANPST Utility?

SCANPST tool’s location may vary in different Microsoft Outlook versions. To find its location you can follow these steps (regardless of any Outlook versions):

Why Do We Need Inbox Repair Utility?

Scanpst.exe tool is needed when an Outlook Data File gets corrupted or damaged due to many reasons. Mostly experienced issues are : shutting down Outlook forcefully , Harmful(Viruses) attack on data file, Hard drive crashing, etc. On account of to these factors, an error messages pops up on the screen which is shown below:

We might encounter another error i.e., 0x800CCC0F Outlook error.

How to Find and Run Inbox Repair Tool?

These steps are to be followed:

  • At first, close your "MS Outlook".
  • Go to (C :) Drive >> Select "Program Files" >> "Microsoft Office" >> "Office14" >> click on "SCANPST".
  • Now, you will see a pop-up window, choose "Browse" button to select the PST Outlook File & click "Start" button.

Location to find PST File: C:\Users\admin\Documents\Outlook Files:

  • Click on "Start" button, and the tool will analyse the file.
  • Now, you’ll see a new window, where the location of PST file will be shown, along with the number of folders found and total items found in this PST file. Make sure to check the option: "Make backup of scanned file before repairing". And then, hit "Repair" button in order to repair the corrupt Outlook PST file.
  • The Inbox tool repair utility will display a "Repair complete" message. Hit "OK" button.

Points to Remember:

  • Create a backup of PST File before performing the SCANPST operation.
  • The all above steps are for MS Outlook 2010, however, these can be performed on any version.

What to do if SCANPST not found?

There can be a scenario where you won’t be able to find SCANPST on its default location. You have to make sure that you haven’t disabled this option:"Show hidden files and folders"

To Check (Window 10 OS):

  • Go to "Ask me anything" and then type "Folder Options" >> Go to "File Explorer Options".
  • You will see a new window with the name "File Explorer Options" . Visit the "View" tab inside the "Advance settings", enable this option- "Show hidden files, folders, and drives" and Hit "OK".

What if Inbox Repair Tool doesn’t work?

If Inbox Repair Tool fails to repair corrupted PST file, then it only happens when your PST file is severely damaged. This tool is capable to repair only minor level corruption in Outlook PST files. If you need a utility to repair major level corruption of PST files, you won’t find any such tool in web. In that condition, you can switch to any third party source which is capable to repair corrupted PST File in Outlook.